🔖 Assumed post audience: someone who wants to know what it takes to setup self hosted air quality monitor.
Recently I pulled the trigger and bought air quality monitor from AirGradient. Definitely not because my city has plummeted from bad to worst1.
This post will contain everything I did to set up AirGradient, all the way to storing and viewing historical data locally.
What parts/components/tools are used?
For air monitoring
- AirGradient DIY Pro, I bought 2 units, pre-soldered kit.
My kit includes:
- Pro PCB version 4.2
- ESP8266 WeMos D1 mini v4 microcontroller
- Senseair S8 CO2 sensor
- Plantower PMS5003 PM sensor
- Sensirion SGP41 VOC and NOx sensor
- Sensirion SHT40 temperature and humidity sensor
- SH1106 128x64 1.3" OLED display
- USB-C 2m cable
- plastic enclosure, screws, and (small) screwdriver
- Power supply, 5V 3A. This forum post mention they recommend 5V and at least 2.4A for WeMos D1 used in the pro kit. I could only find made-in-China power supplies here, it’s better than nothing.
- USB cable, 3m, USB-A to USB-C with right angle so it can fit behind the air monitor. The supplied 2m cable is not enough for me.
- 3M adhesive hooks and random knitting threads. Using plastic hooks + threads so I don’t have to put a hole in the wall to hang the air monitor.
For storing and viewing sensor data
TL;DR I’m using Home Assistant container on old MacBook for local server.
AirGradient has their own home server to host the data sent from the sensor. I got free 2 year subscription for their server from buying their pro kit.
That means:
- I need 24/7 internet connection to send the data,
- and sending all sensor data to uncontrolled server 🙁.
I don’t really like that idea, so I will need my own local server to handle the sensor data. And reflash the AirGradient microcontroller to send the data to my server instead.
Searching the internet leads me to Home Assistant (HA) + ESPHome setup.
My options for hosting HA are:
- reuse Raspberry Pi 2 model B that already runs Pi-hole,
- use old 15" MacBook from 2015,
- use cheapo 14" Lenovo laptop from 2015 (it runs Arch btw),
- reuse cloud VM (small droplet in SG region that runs NixOS),
- buy ready-to-use Home Assistant server,
- buy new Raspberry Pi 4
I went through the possible HA installation methods to cross-check which host should I use for HA.
Possible HA installation methods are:
- Supervised: this requires strict dependencies setup and maintaining them, no go.
- OS: this requires wiping the host OS or running VM inside the host, which requires non-trivial overhead for CPU consumption etc. Keen to avoid this.
- Core: oh it’s Python, sorry but I do not want to manage Python installation, no go.
- Container: this require a container environment and running a built HA image.
Container installation is the most sane setup for me, so I’m going with it. (Later on I realized HA container cannot use HA add-ons. That means I cannot use ESPHome HA add-ons to make things easier. But that is fine, I could live without the add-ons.)
Going back to my hosting choices and by the process of elimination:
- Raspberry Pi 2 probably won’t be strong enough, HA recommends Pi 3 or 4. So, no go. (I saw some people tried running HA on Pi 2B, it’s kinda hit and miss.)
- Cloud VM probably will work, but requires internet connection. Keeping this as last resort.
- HA Yellow, I checked the price from the Chinese supplier, it’s going to cost 179 USD or more, not including shipping and tax. No thanks, that’s too expensive for me.
- New Raspberry Pi 4: The official supplier is either gone or out of stock here. And there’s only scalper with crazy price tag in local marketplace. No thanks.
- Old laptops, these are my best bets for now.
At the end, I picked the MacBook over Lenovo since it has better CPU. It runs macOS 12 and the UI is a bit laggy, but it should be good enough since I’m only accessing it via SSH anyway.
For flashing the microcontroller
I need to reflash the D1 mini to make it send data to my server. I have no idea how to do it though, reading ESPHome website feels overwhelming at first. After furiously reading the docs, FAQ, and a mug of coffee, I think I get it.
With ESPHome, you:
- write declarative config (in YAML) for the micrcontroller firmware instead of writing the code directly.
- use ESPHome CLI to compile the YAML config into a runnable firmware and upload it to the microcontroller.
I will be using Docker on macOS to run ESPHome and according to this, I won’t be able to flash via USB cable. So I will need to use ESPHome’s web flasher.
What work are done to start seeing numbers in dashboard?
Assembling the AirGradient kit
AirGradient has the full assembly instruction in their website. Mine is pretty straightforward since I bought the pre-soldered kit which involves sticking sensor to the correct places.
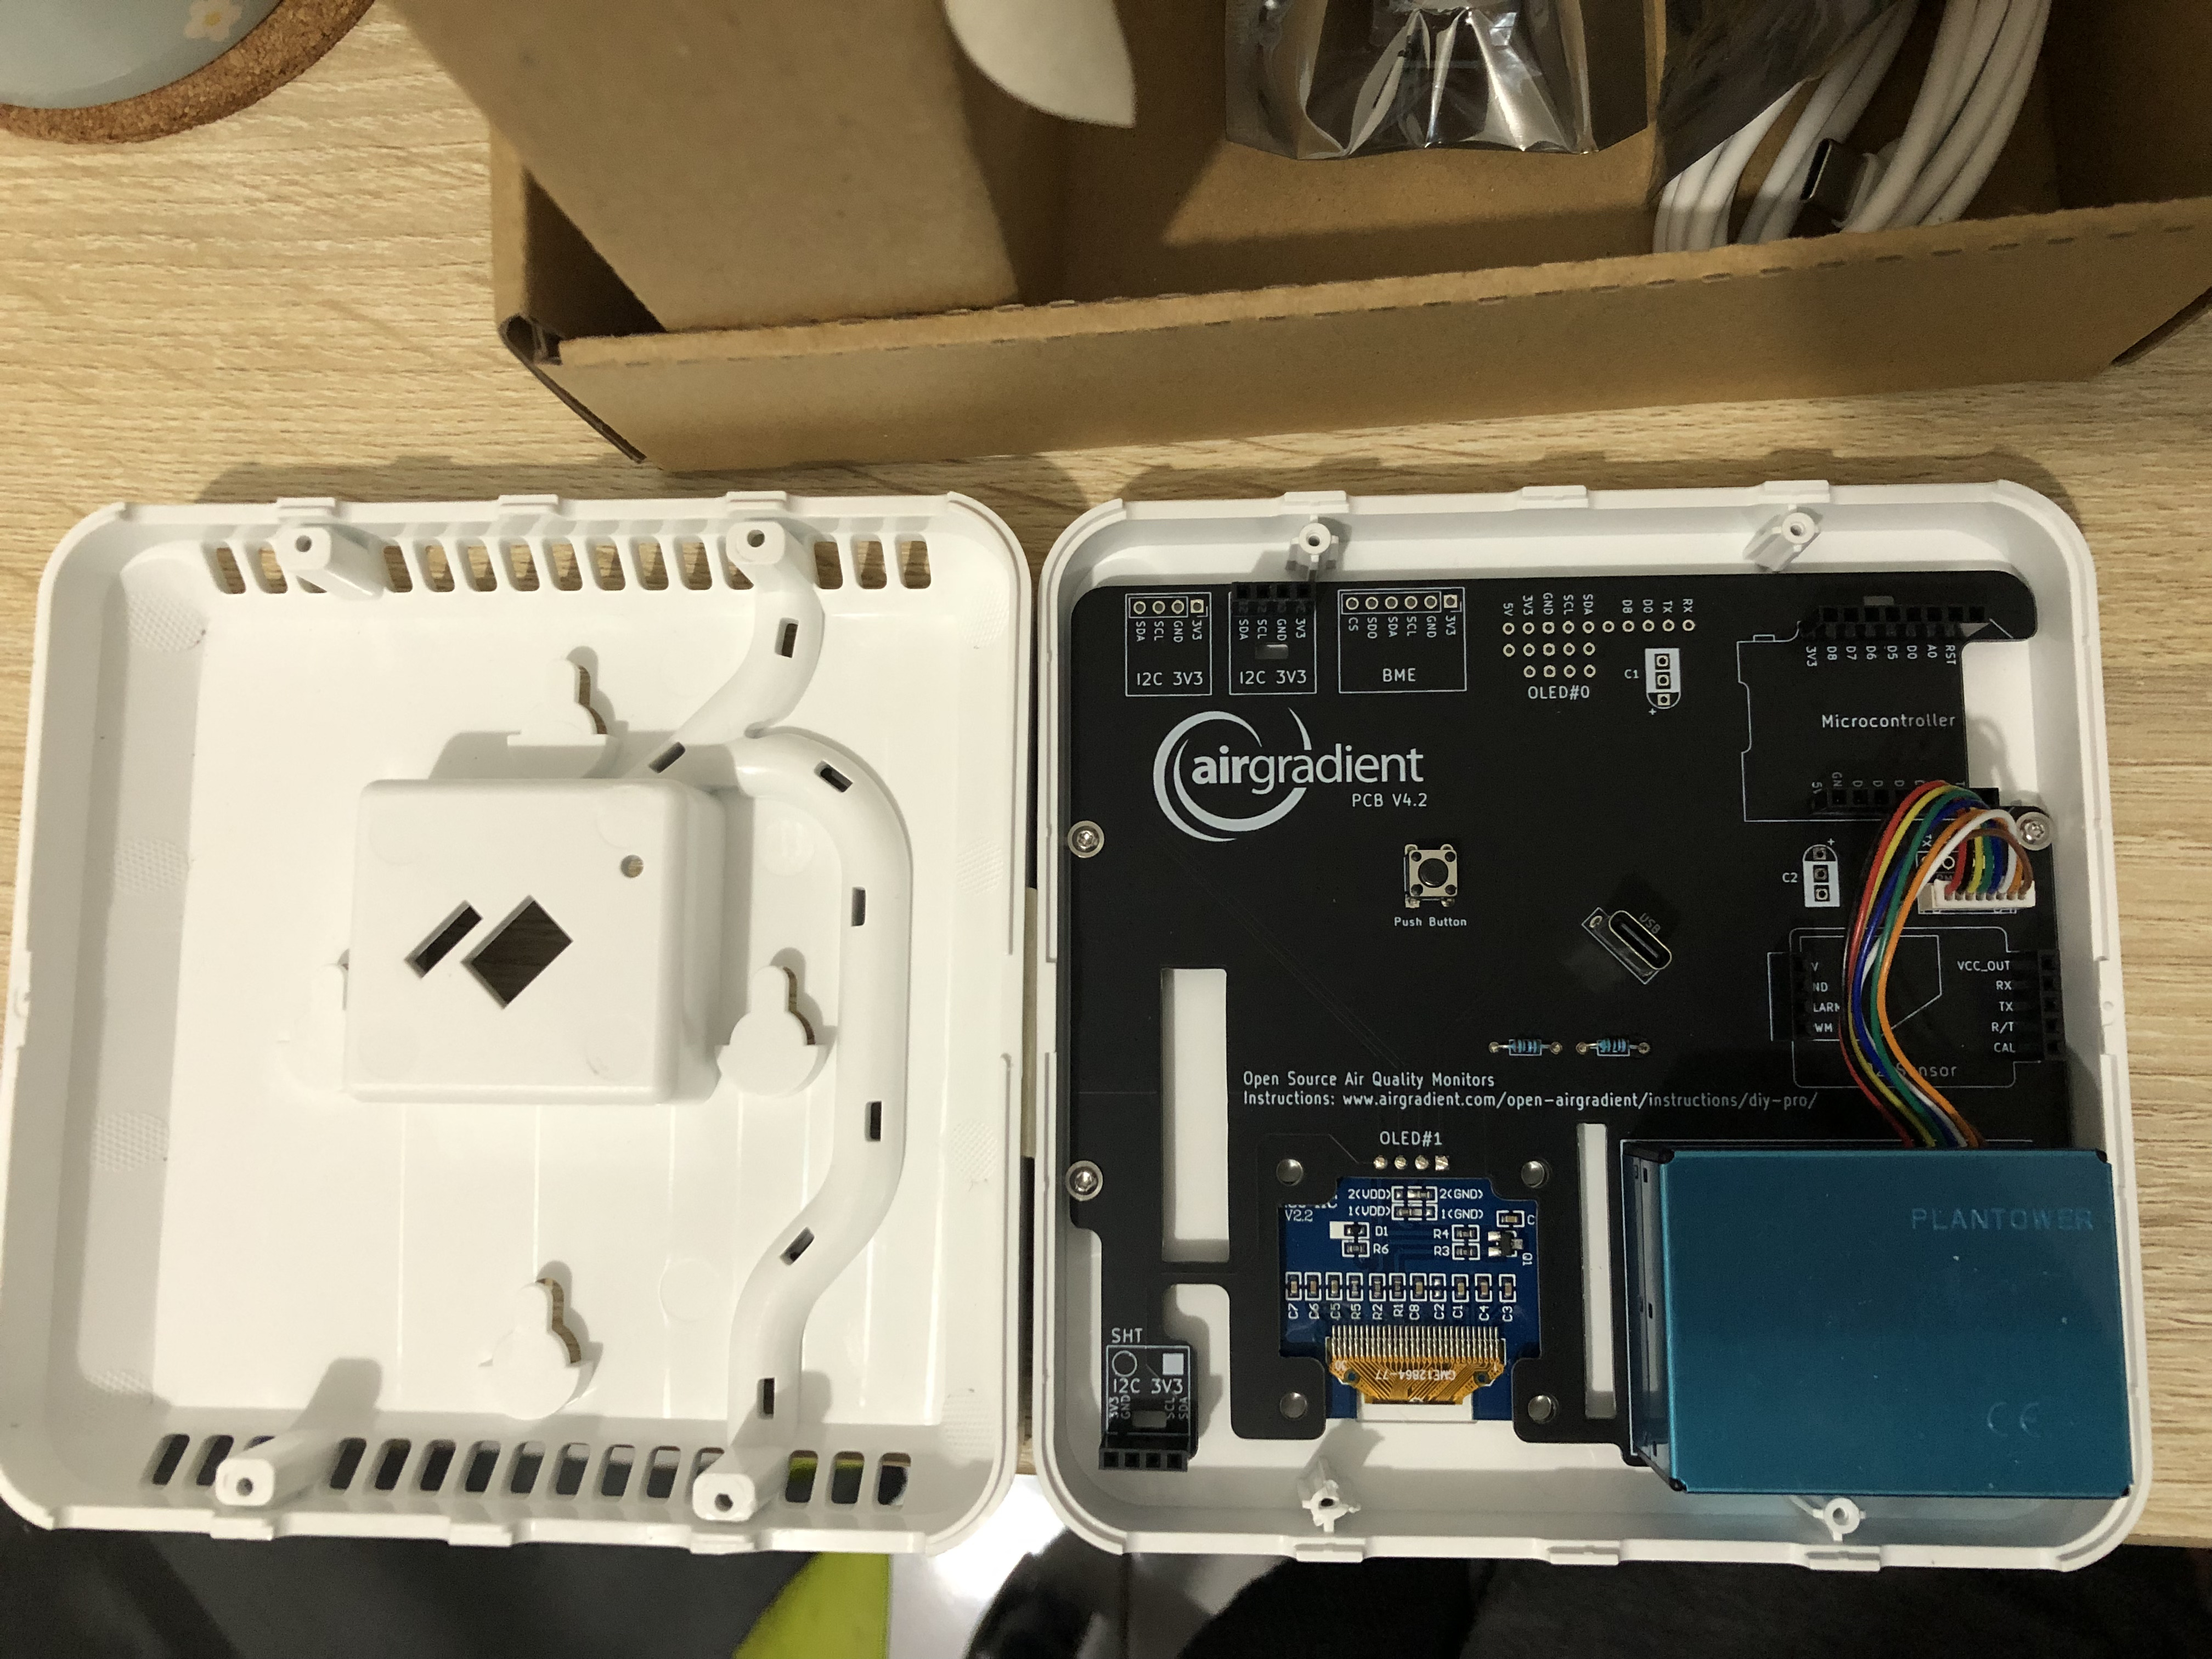
Pre-soldered AirGradient kit that comes with the display and PM sensor already attached.
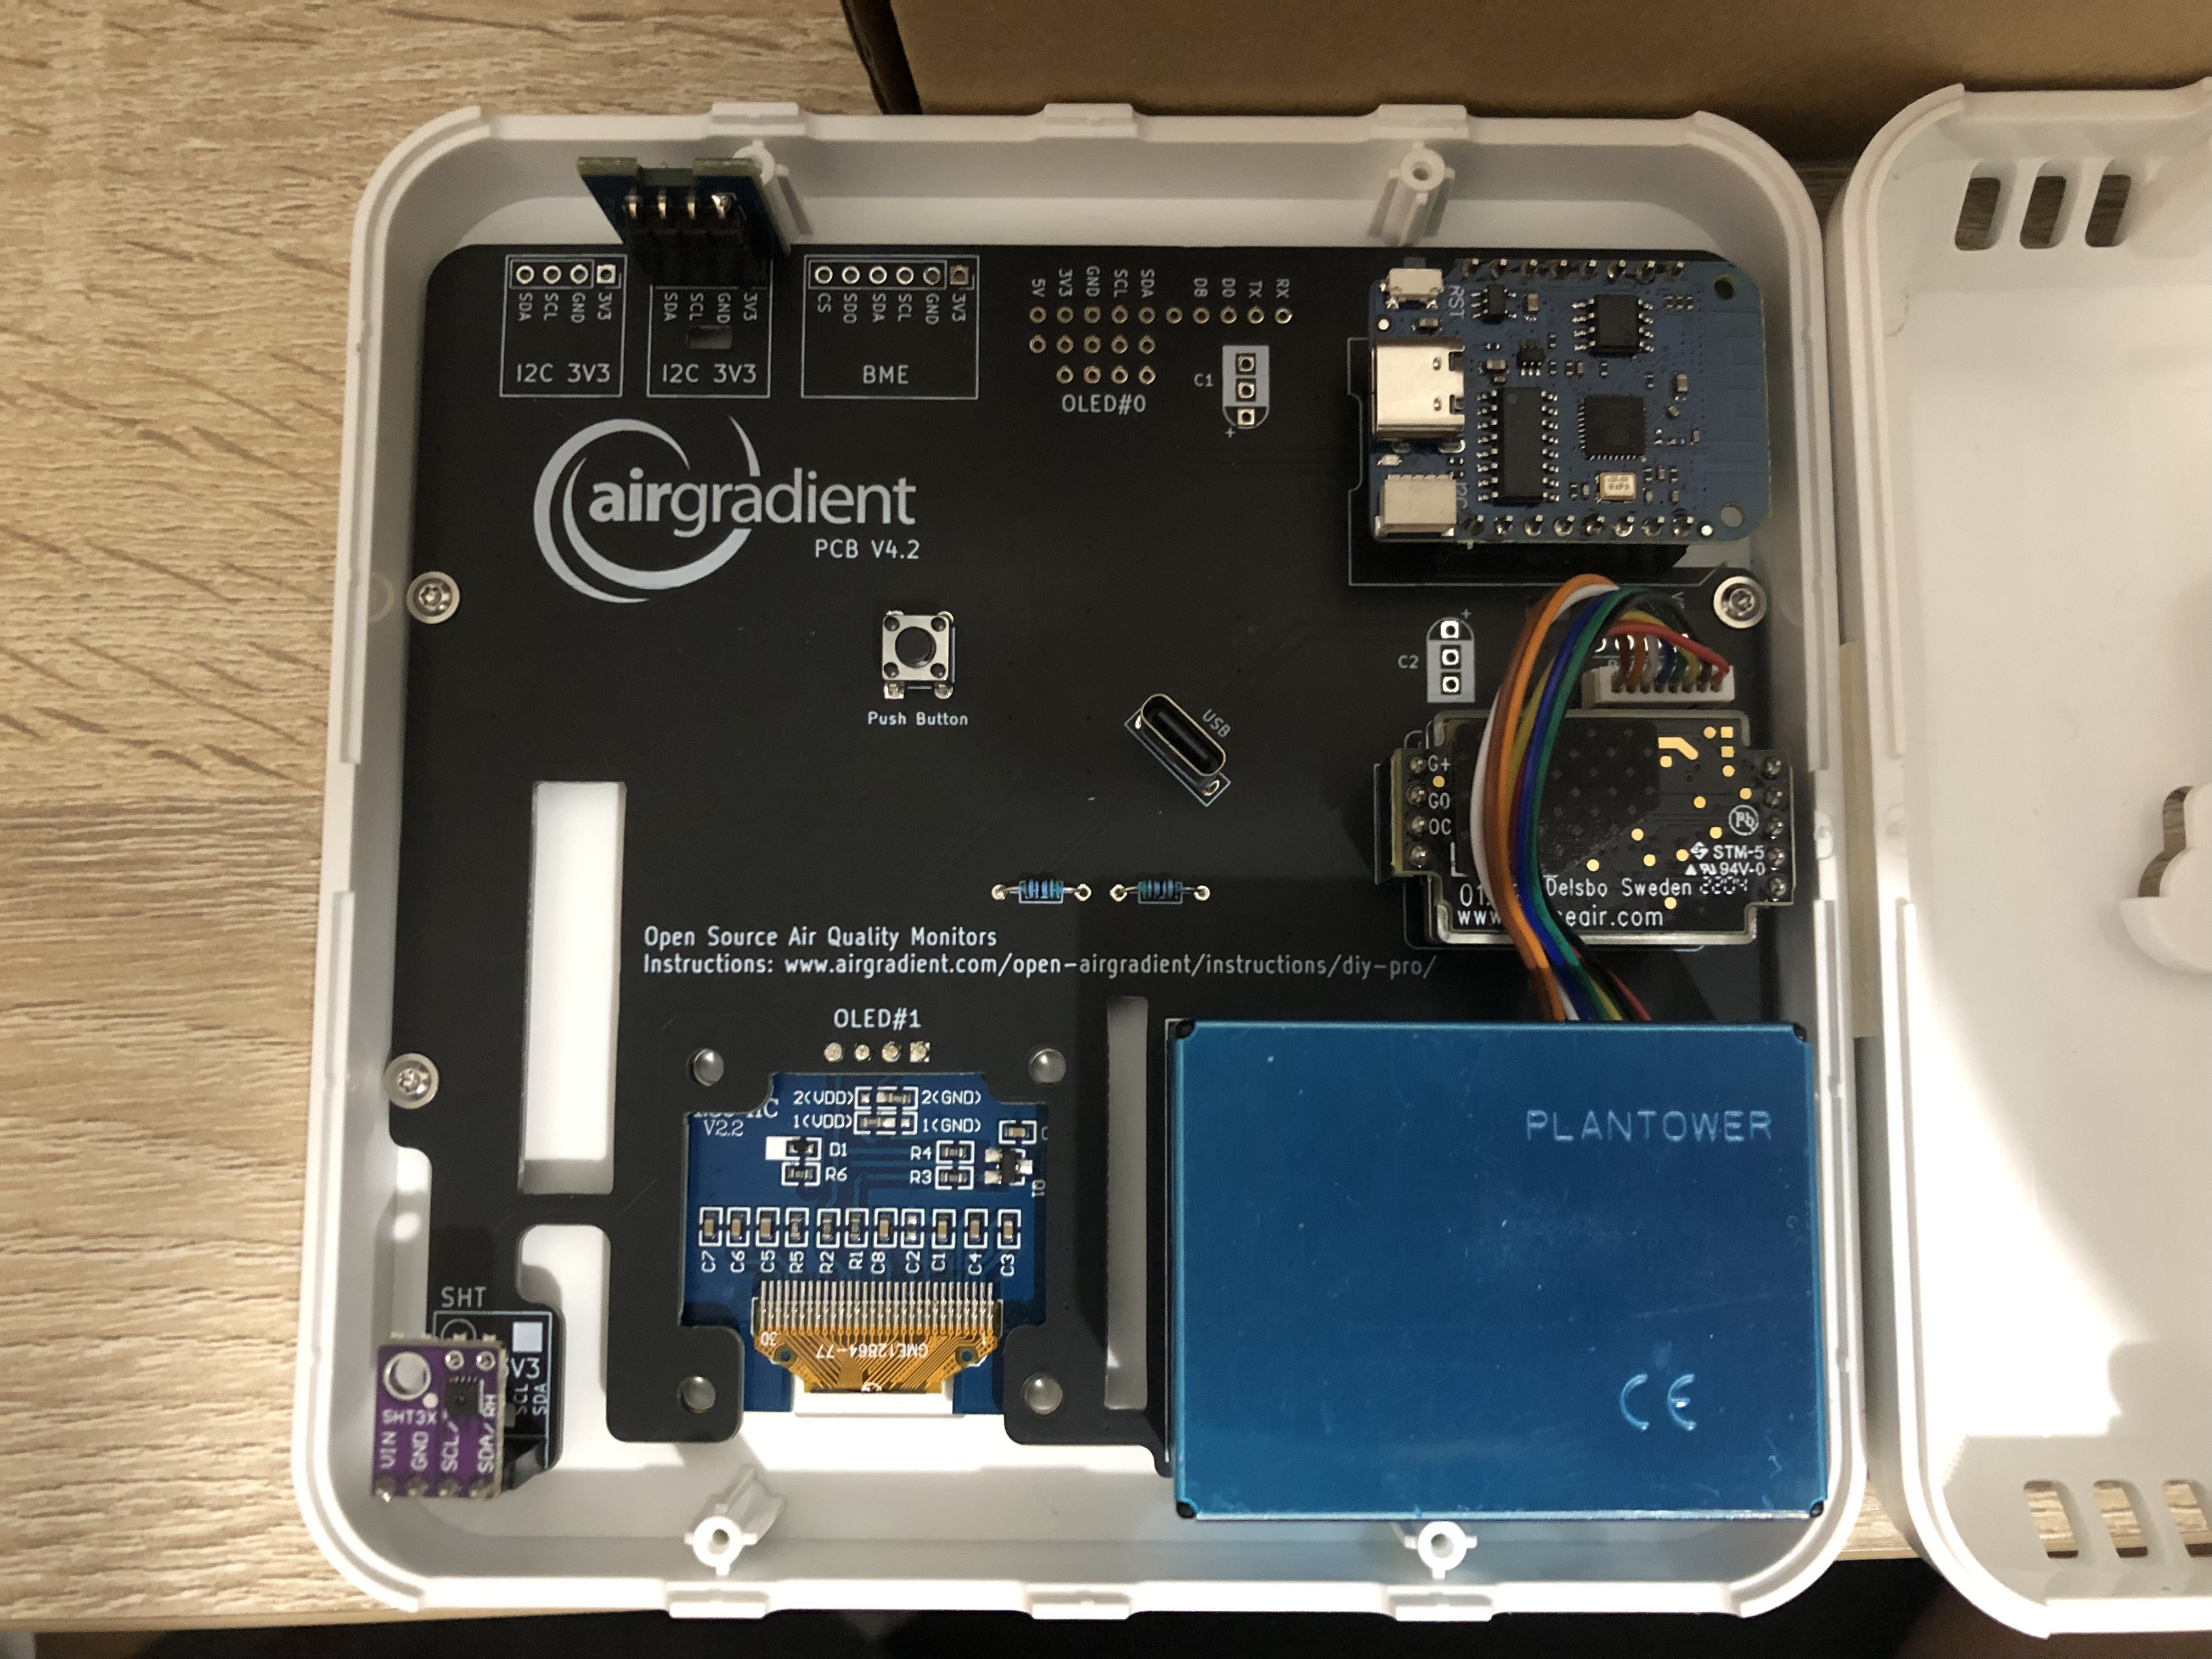
Fully assembled kit, with everything sticked in.
Sanity checking the kit
Power on the kit by connecting to power supply. Make sure everything is looks good, sensors and display are working. Better do this before screwing the enclosure tightly.
I don’t have other sensor for baseline of the installed sensors though. So I can’t sense check the sensor values.
Flashing the microcontroller
- Connect the microcontroller directly to a computer with USB cable. Connecting the cable to the PCB will not work!
- Open up web flasher.
- In the flasher, press connect and pick the microcontroller and connect. On mine, it says “USB Serial (cu.usbserial-1120)”. Yours might be different.
- Press “PREPARE FOR FIRST USE”. Read the explanation first and install after understanding it.
- Wait for it to finish installing.
- After done installing, continue setting up Wi-Fi for the device in the flasher. This will allow us to flash over the network.
- If everything works fine, you should be able to access the web server hosted in the microcontoller by accessing the device IP directly.
At this point we can start writing ESPHome config be flashed over the network. I would expect myself taking months to finish writing the config. Thankfully a nice person has shared their config in the internet, like this one. I end up using this config from @ex-nerd’s PR. Specifically this file that’s intended for AirGradient Pro version 4.2.
Steps I did for compiling the firmware:
- Copy the AirGradient config YAML and
secrets.yaml, save them in a new directory somewhere in the computer. - Modify the config as needed, the instruction comments in there is pretty self explanatory. While editing the YAML, the editor IDE might complain about “Unresolved tag: !secret”. It’s fine to ignore those warnings. Those are HA config specifics that is also supported by ESPHome.
- Fill in the variables in the
secrets.yaml. For thehome_assistant_encryption_key, it needs to be base64 string. The docs page from ESPHome has a generator for it.✅ Make sure to backup
secrets.yaml, otherwise you will need to reflash if you lose access. - Run ESPHome CLI to compile and upload the firmware to the microcontroller.
I’m using Docker to run it, so mine looks like this:
docker run --rm -v "${PWD}":/config -it ghcr.io/esphome/esphome run air-gradient-pro-diy.yaml.
In my case, the upload step failed because esphome unable to find my device.
Error log:
...
Linking .pioenvs/airgradient-pro-0/firmware.elf
RAM:   [=====     ]  49.3% (used 40392 bytes from 81920 bytes)
Flash: [======    ]  64.7% (used 675549 bytes from 1044464 bytes)
Building .pioenvs/airgradient-pro-0/firmware.bin
esp8266_copy_factory_bin([".pioenvs/airgradient-pro-0/firmware.bin"], [".pioenvs/airgradient-pro-0/firmware.elf"])
================================================================================= [SUCCESS] Took 536.00 seconds =================================================================================
INFO Successfully compiled program.
INFO Resolving IP address of airgradient-pro-0.local
ERROR Error resolving IP address of airgradient-pro-0.local. Is it connected to WiFi?
ERROR (If this error persists, please set a static IP address: https://esphome.io/components/wifi.html#manual-ips)
ERROR Error resolving IP address: Error resolving address with mDNS: Did not respond. Maybe the device is offline., [Errno -3] Temporary failure in name resolution
So I had to setup static IP in the config and rerun the docker command.
wifi:
  ...
  manual_ip:
    # Set this to the IP of the ESP
    static_ip: "192.168.100.152"
    # Set this to the IP address of the router. Often ends with .1
    gateway: "192.168.100.1"
    # The subnet of the network. 255.255.255.0 works for most home networks.
    subnet: "255.255.255.0"
After rerunning the compile command and a successful uploads, the CLI will start streaming the logs from the device nonstop. Success logs:
...
INFO Successfully compiled program.
INFO Connecting to 192.168.100.152
INFO Uploading .esphome/build/airgradient-pro-1/.pioenvs/airgradient-pro-1/firmware.bin (680288 bytes)
INFO Compressed to 475364 bytes
Uploading: [============================================================] 100% Done...

INFO Waiting for result...
INFO OTA successful
INFO Successfully uploaded program.
INFO Starting log output from 192.168.100.152 using esphome API
INFO Successfully connected to 192.168.100.152
[19:48:18][I][app:102]: ESPHome version 2023.8.2 compiled on Sep  8 2023, 19:46:22
...
Can terminate the CLI safely after upload succeeds and it start streaming the logs.
The display should also lit up and start showing the pages specified in the config YAML.
Some of sensor numbers might show up as N/A for a while.
I haven’t debugged this, but after leaving it powered on for few mins,
N/A got replaced with numbers.
So the sensors might be just starting and simply haven’t picked up and sent any data yet.
Now we have the sensors ready to send data, it’s time to setup the receiving part!
Setting up Home Assistant container
MacOS HA installation docs actually does not have container installation.
Luckily prior to this, I already found this post from Ixion about setting up Home Assistant on macOS.
I accidentally found that post when trying to find a way to run HA VM image using Lima,
with the lima keyword accidentally matching on the colima used in the post.
What I did to set up HA is exactly as described in Ixion’s post, summarized as:
- Install Colima and Docker on macOS (using brew)
- Start Colima
- Configure Colima to use the host network
- Install Home Assistant on Docker
- Set up Home Assistant
With some exceptions:
- When configuring Lima to use
socket_vmnet, my path forsocket_vmnetis different. I had to a bit of manualcdandlsritual, and found mine on/usr/local/opt/socket_vmnet/bin/socket_vmnetinstead of/opt/homebrew/bin/socket_vmnet. I just learned brew has subcommand for finding the path,brew info <formula>, e.g.brew info socket_vmnetand it will spit out the installation path. - When opening the network settings in HA, mine is blank.
Turns out I need to turn on “Advanced Mode” in my HA profile.
After that, I can open the network settings and pick
lima0network adapter. Before realizing that, I thought the network settings is not accessible remotely. I tried accessing from localhost by port forwarding the dashboard, it didn’t help at all.
Connecting AirGradient with Home Assistant
According to this HA docs, HA should be able to automatically discover a running ESPHome device in the same network. I have not tried it. Instead I tried manually adding the ESPHome device or in this case the AirGradient to HA.
From the HA dashboard, do:
- Open “Settings > Devices & Services”,
- In “Integrations” tab, press “ADD INTEGRATION” in bottom right,
- Search and click “ESPHome” integration,
- Put the AirGradient IP in the host field, keep the default
6053port, and submit. - If HA can find and connect to AirGradient, it will ask for encryption key.
Paste in the
home_assistant_encryption_keyconfigured insecrets.yamlthat’s used for flashing the AirGradient.
That’s all! I can see my AirGradient sensors in HA dashboard.
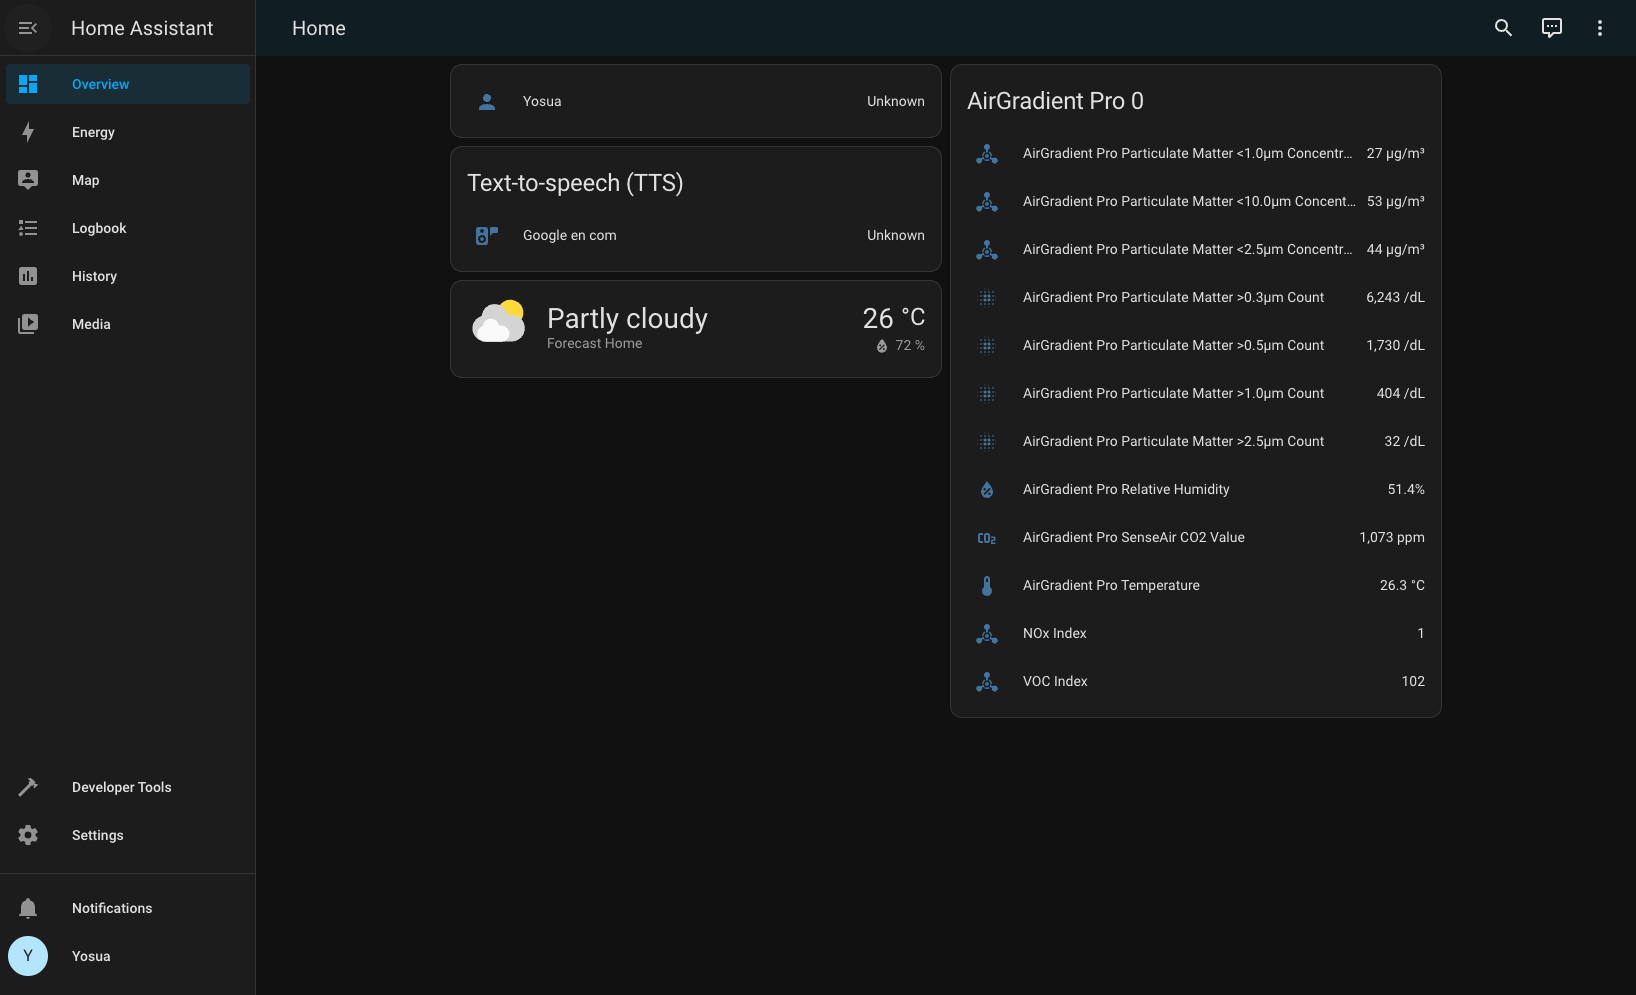
My HA dashboard after connecting one AirGradient kit.
Why I’m getting Can't connect to ESP. when connecting AirGradient to HA?
Make sure AirGradient is discoverable from HA.
In my case, I was accessing HA dashboard via Tailscale Magic DNS.
So my dashboard URL looks like: http://unicorn:8123.
And when adding AirGradient, I keep getting Can't connect to ESP. error
even with the correct IP.
After using SSH tunnel to expose the dashboard as: http://localhost:8123,
adding AirGradient worked!
The tunnel command looked something like this:
ssh -L 8123:localhost:8123 -N -T darcien@unicorn
My HA container does not expose any address in colima list!
Try doing colima restart, and restart the HA container.
Also check the container log for more clue.
Restarting HA container with colima restart failed!
In my case, colima gives a nice hint:
❯ colima restart
INFO[0000] stopping colima
INFO[0000] not running                                   context=vm
INFO[0000] done
INFO[0003] starting colima
INFO[0003] runtime: docker
INFO[0003] preparing network ...                         context=vm
INFO[0003] starting ...                                  context=vm
> Using the existing instance "colima"
> can't read "/private/etc/sudoers.d/lima": failed to run [sudo --user daemon --group everyone --non-interactive true]: exit status 1 (Hint: run `limactl sudoers >etc_sudoers.d_lima && sudo install -o root etc_sudoers.d_lima "/private/etc/sudoers.d/lima"`))
FATA[0003] error starting vm: error at 'starting': exit status 1
It was a permission issue, and running the command specified in the hint fixed it.
limactl sudoers >etc_sudoers.d_lima && sudo install -o root etc_sudoers.d_lima "/private/etc/sudoers.d/lima"
How much does it cost total?
| Parts | Price (IDR) |
|---|---|
| AirGradient Pro DIY (pre-soldered) x 2 | 4.544.100 |
| AirGradient import tax | 294.400 |
| Power supply 5V 3A x 2 | 271.700 |
| USB-C 3m cable | 93.500 |
| 3M plastic hook x2 | 29.640 |
| Old MacBook | 0 |
| — | — |
| Total | 5.233.340 |
Using 1 USD = 14850 IDR conversion for AirGradient price calculation.
It’s a bit expensive for your average Indonesian, but still pretty good price when compared to commercial air monitor sold here, like this AirTest from Aria Indonesia. The AirTest only have PM2.5 sensor, no idea what specific sensor is installed in it. It is sold at 1.990.000 IDR and have 30 days pre-order2, now that’s expensive for a single sensor with closed design.
How much electricity does this setup use?
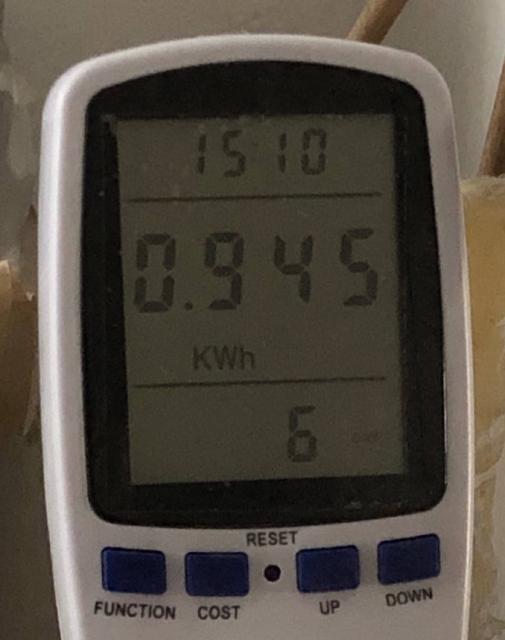
A power meter showing 0.945 KWh after 6 days 15 hours 10 minutes for the server (from empty battery).
0.945 KWh = 6 days 15 hours 10 minutes
0.945 KWh = 9550 minutes
0.006 KWh = 60 minutes
That’s 0.006 KWh per hour, or 4.32 KWh per month. So I’m paying around 6.241 IDR per month using 1.444,7 IDR per KWh rate.
I’m excluding the electricity usage from the sensors because they’re too low. Leaving the metered sensors a week gave me 0 KWh on the power meter.
What is the gfonts:// in the ESPHome config?
It’s a special ESPHome syntax for using Google Fonts in the display.
How long until the sensors needs to be replaced?
I’m not too sure yet. I’m seeing some discussion about this in AirGradient forum, and AirGradient said they still have PMS5003 sensor working even after 4 years3. I sure hope Jakarta’s air is not polluted enough to the point I need to replace PM sensors often. At that point, sensor life expectancy is the least of my worries.
Back up plans for HA container?
As I just finished with setting up, I have no concrete plans yet. I looked a bit into the forum and found this thread which has various approaches. Standing up an automatic backup most likely won’t be a 5 minutes job, so I will need to revisit this later.
How accurate is the PM sensors used? i.e. PMS5003
I learnt from this post that PMS5003 is using approximation for PM2.5 and PM10, and is only accurate for PM1. Well fortunately, the in-depth explanation proves PMS5003 is good enough for urban environment that doesn’t change too much like my bedroom and livingroom!
Various photos
AirGradient packaging and boxes
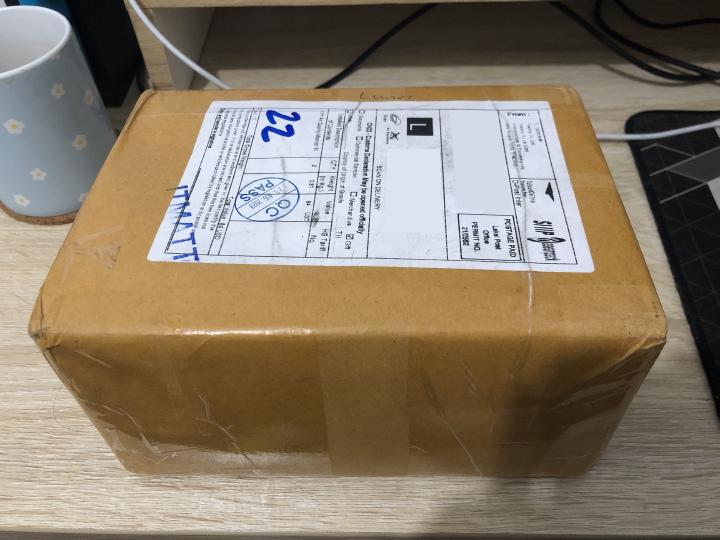
AirGradient package that looks manually packaged by hand and sent from Thailand.
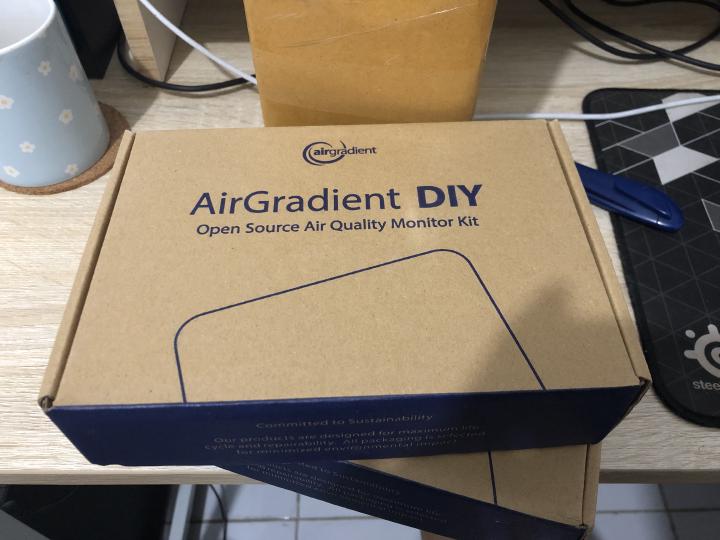
Two boxes of AirGradient Pro DIY kit.

First look after opening the kit.
AirGradient
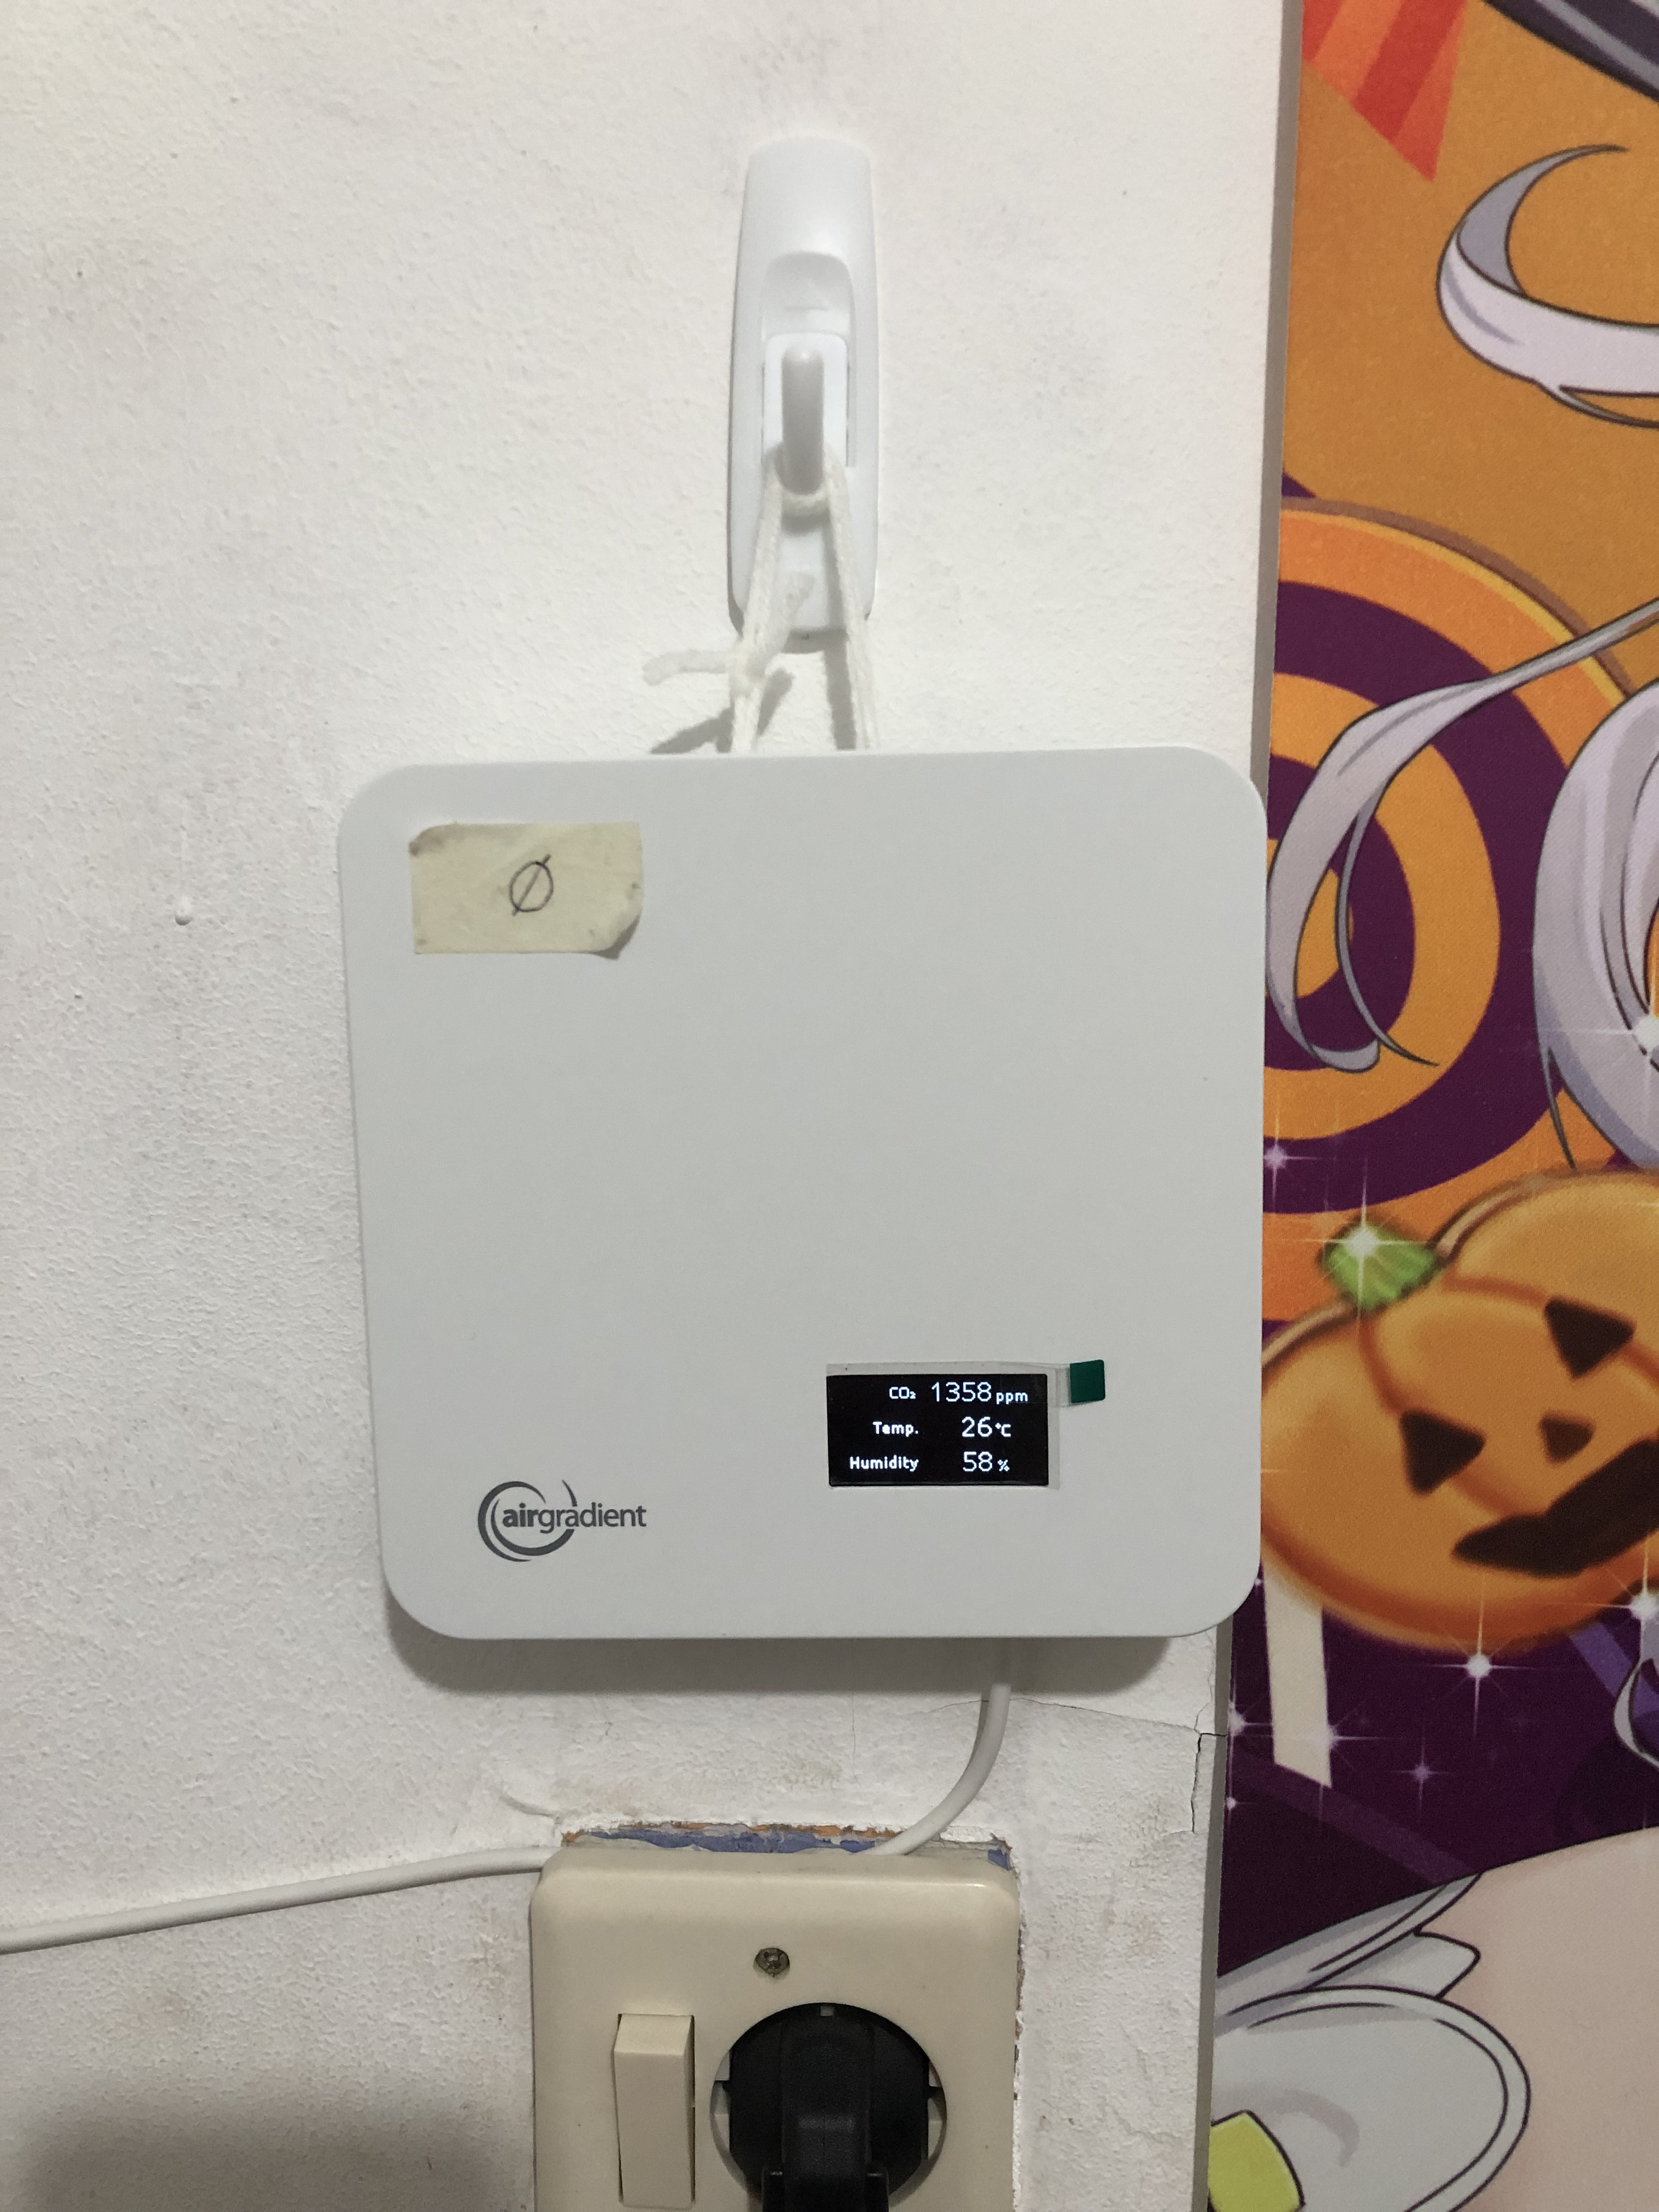
AirGradient in action. Yes, the CO2 is high, my room has bad air circulation. Yes, the electric socket below has slight openings and is hazardous, I need to fix it eventually.
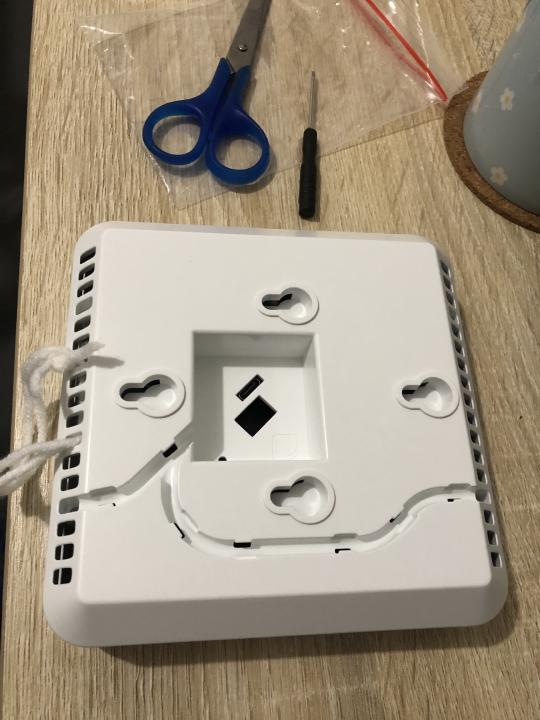
Back side view of AirGradient. To avoid punching a hole in the wall, I’m using knitting thread to hang the unit.
Others
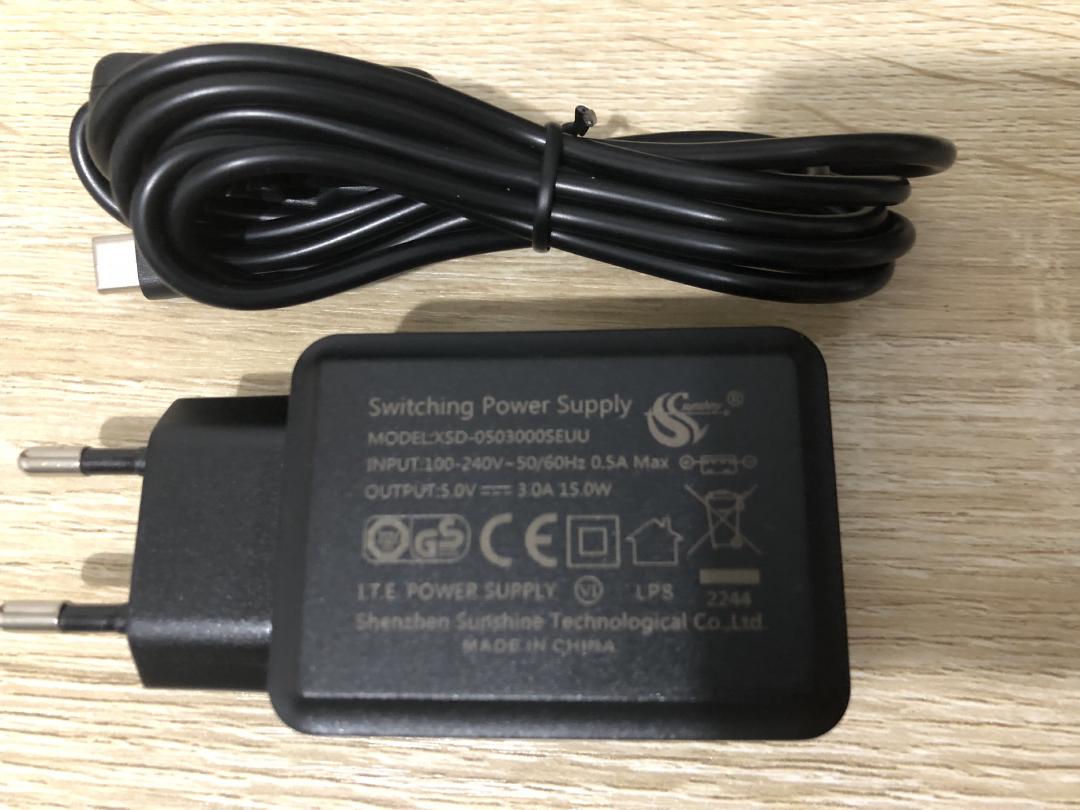
The 5V 3A power supply I’m using for powering AirGradient.
Changelog
- 2023-10-13: add electricity usage
- 2023-09-08: initial version
Post 22 of #100DaysToOffload.
https://edition.cnn.com/2023/08/16/asia/indonesia-pollution-jokowi-cough-intl-hnk/index.html ↩︎
https://web.archive.org/web/20230909181316/https://www.tokopedia.com/ariatechnologies/indoor-air-quality-pm2-5-monitor-aria-airtest ↩︎
https://forum.airgradient.com/t/extending-the-life-span-of-the-pms5003-sensor/114/23#:~:text=We%20have%20many%20PMS5003%20still%20working%20after%20four%20years%20without%20issues.%20If%20you%20are%20not%20living%20in%20a%20very%20polluted%20environment%20they%20will%20probably%20last%20longer%20than%203%20years. ↩︎